8 Common Hand Signals for Dog Training & How to Teach Them
Owning a dog can bring you immeasurable joy, but these loyal companions also require a lot of work, especially if you get a puppy. Effective training can make your dog ownership significantly less stressful and more enjoyable.
While you can employ several techniques to train your pet, dog training experts understand how best to teach your dog how to behave. Nevertheless, learning hand signals for dog training ensures you understand how to train your pet effectively from the start.
Quick Answer: Common Hand Signals for Dog Training
Why use hand signals for dog training? Hand signals are crucial for communicating with dogs that are deaf or hard of hearing, and they reinforce verbal commands in noisy environments. Dogs are natural visual learners, often responding faster to body language than voice alone.
The Top 5 Signals to Teach First:
Sit: Open palm moving upward (like tossing a ball).
Down: Flat palm moving straight down toward the floor.
Stay: Open palm facing forward (like a “Stop” sign).
Come: wide sweeping motion of the arm toward your chest.
Watch Me: Finger pointing from the dog’s nose up to your eyes.
How to Start: Use the “Lure and Reward” method. Hold a treat to guide your dog into position (the lure), and as soon as they obey, mark it with “Yes!” and give the treat (the reward). Keep sessions to 5–10 minutes for the best results.
Why Dogs Respond Well to Hand Signals
Many new dog owners wonder why hand signals are necessary. According to the American Kennel Club, about 5 to 10% of dogs suffer from either partial or full deafness. It’s also common for older dogs to develop hearing deficiencies as they age, making the combination of body language, visual signals, and verbal cues crucial for obedience.
Even without hearing disabilities, hand signals strengthen your pet’s cognition, focus, and attention. Additionally, combining hand signals with a verbal command ensures your dog understands you in loud environments. Finally, training your pet improves your trust and relationship, which makes them more responsive to commands.
The ‘Golden Rules’ of Teaching Dog HandSignals
Before you start, understand these key principles.
- Pair the Signal with the Word: When starting, give the hand signal first, then say the verbal cue (e.g., show the “sit” signal, then say “Sit”). Your dog will learn to anticipate the word and associate the visual signal with the action.
- Use a Lure: The easiest way to teach a signal is to use a treat as a “lure.” The motion you use to guide your dog with the treat becomes the hand signal.
- Keep Sessions Short: Keep training to just 5-10 minutes, 1-2 times a day. This keeps your dog focused and excited to learn.
- Be Consistent: Everyone in the family must use the exact same hand signal for each command.
- Fade the Verbal Cue: Once your dog knows the signal, start using only the hand signal. If they don’t respond, help them by adding the verbal cue back, but reward them more heavily when they get it from the signal alone.
Foundational Signals (The ‘Big 3’) to Teach First
Before you get to the fun tricks, start with these essential signals for focus and control.
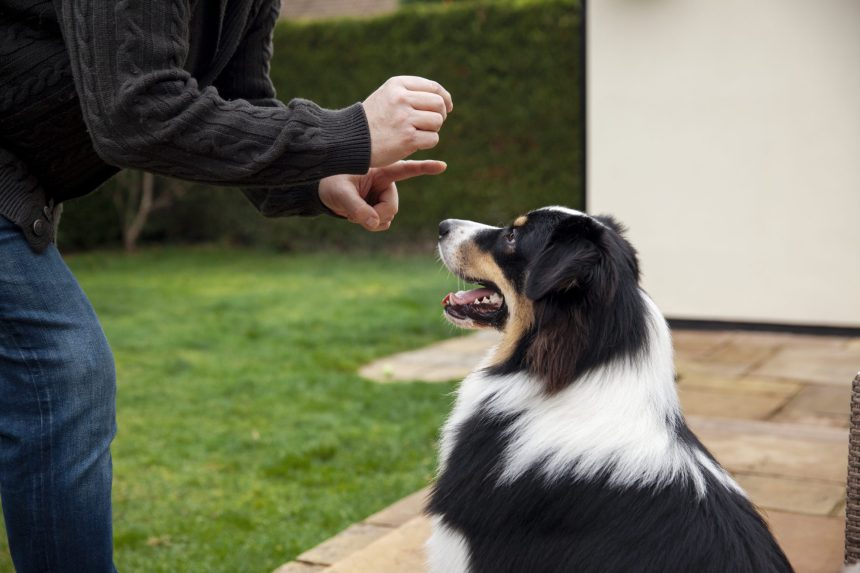
1. Watch Me (Focus)
- The Signal: Take a pointed finger from your dog’s eye level up to your own eyes.
- How to Teach It:
- Hold a treat in your hand. Let your dog sniff it.
- Perform the signal, moving your hand from their nose up to your eyes.
- The moment their eyes meet yours, say “Yes!” and give them the treat.
- Practice this until you can do it without a treat in your signal hand (but still reward them from your other hand).
2. How to Teach the Sit Hand Signal for Dogs
Dogs are naturally visual learners. While they can learn hundreds of words, they often respond much faster to body language. Teaching the sit hand signal for dogs is one of the first and most useful non-verbal commands you can establish. It creates a clear line of communication, even in noisy environments where your voice might be drowned out.
The standard hand signal for “Sit” looks like an open palm moving upward, as if you are tossing a ball gently into the air. This motion mimics the “luring” technique used to teach the command originally.
Step-by-Step Guide to the Sit Hand Signal
1. The Lure (Creating the Motion) Start with a high-value treat in your hand. Hold your hand right in front of your dog’s nose so they can smell the food. Slowly lift your hand up and back over their head, towards their ears.
Why this works: As the dog lifts their head to follow the treat, their rear end naturally lowers to the ground to maintain balance.
2. Mark and Reward The exact moment their bottom touches the floor, mark the behavior with a “Yes!” or a clicker, and immediately give them the treat. Repeat this 10 to 15 times until the dog understands that the upward hand motion leads to a reward.
3. Remove the Food (The Empty Hand) Now, remove the treat from your hand. Use the exact same motion—palm open, moving upward over the dog’s head. Your hand should start near your side and sweep upward.
If the dog sits, reward them immediately with a treat from your other hand or your pocket. This teaches them to follow the sit hand signal for dogs rather than just following the food.
4. Refine the Signal Over time, make the movement smaller. You do not need to sweep your arm all the way over their head forever. Eventually, a subtle upward flick of the wrist with an open palm will be enough for your dog to understand the command from a distance.
3. Lay Down
- The Signal: Start with your dog in a “Sit.” Hold your hand flat, palm facing down, and move it straight down from their nose toward the floor.
- How to Teach It:
- Hold a treat in your hand and perform the signal, luring their nose down to the floor.
- Once their nose is at the floor, slowly pull the treat away from them (horizontally along the floor) until they are in a full “down” position.
- Say “Yes!” and reward.

8 Fun & Helpful Hand Signals to Teach Next
Once your dog has mastered the basics, you can move on to these fun and useful signals.
1. Come
- The Signal: Start with your arm extended out to your side, then swing it in a big, sweeping motion toward your chest or leg.
- How to Teach It:
- When your dog is a short distance away, perform the signal and say “Come!” in an excited voice.
- Reward them heavily with treats and praise when they get to you. Never use the “Come” signal for something negative (like a bath).
2. Stay
- The Signal: Hold your hand open with your palm facing forward, like a “stop” sign.
- How to Teach It:
- Ask your dog to “Sit” or “Lay Down.”
- Give the “Stay” signal and wait one second.
- If they hold their position, say “Yes!” and give them a treat.
- Gradually increase the time (1 second, 3 seconds, 5 seconds) before you reward.
3. Drop It
- The Signal: Point your finger firmly toward the floor.
- How to Teach It:
- Give your dog a toy. Then, show them a high-value treat.
- When they open their mouth to take the treat (and drop the toy), say “Drop It!” and give them the treat.
- Practice this, adding the hand signal before you show the treat.
4. Fetch (or “Take It”)
- The Signal: Point your finger directly at the object (toy, ball) you want them to pick up.
- How to Teach It:
- Point at the toy and say “Fetch!”
- When your dog moves toward it, praise them.
- Once they pick it up, use your “Come” signal to have them bring it to you.
5. High Five (or “Paw”)
The Signal: Kneel down and hold your hand out, palm open, in a “high five” position.
- How to Teach It:
- Show your dog a treat in your other hand, then close your fist.
- Present your open “high five” hand. Your dog will likely nudge or paw at your treat hand.
- The moment they lift their paw to touch your open hand, say “Yes!” and give them the treat from your fist.
6. How to Teach a Dog to Roll Over (Hand Signal & Lure)
Teaching a dog to roll over is a classic party trick, but it is also a fantastic exercise for building trust. It requires your dog to expose their belly a vulnerable position which strengthens the bond between you. While many owners rely on voice commands, teaching the hand signal for roll over creates a clearer, more consistent cue.
The standard hand signal for “Roll Over” is a circular motion with your index finger or hand, mimicking the rotation you want the dog’s body to make.
Step-by-Step Guide to Teaching Roll Over
1. Start in a “Down” Ask your dog to lie down. If they do not know “Down” yet, you must teach that first. The dog needs to be lying flat on their stomach with their paws in front of them (the “Sphinx” position).
2. The Shoulder Lure Hold a high-value treat near your dog’s nose. Slowly move your hand from their nose toward their shoulder and then back toward their spine.
The Goal: You want the dog to turn their head back to follow the treat. As their head turns, their weight will shift to one hip, causing them to flop onto their side. Mark this with “Yes!” and reward.
3. The Full Rotation: Once the dog is comfortable lying on their side, continue the motion. Move the treat from their shoulder, over their backbone, to the other side of their body.
Imagine drawing a circle in the air with the treat. The dog should follow the lure, rolling onto their back and flipping over to the other side to get the food.
Trainer Tip: If your dog gets stuck on their back, gently encourage them. Do not force them physically.
4. Introduce the Hand Signal: Once your dog is rolling consistently with the food lure, remove the treat from your hand. Use the same circular motion rotate your index finger or hand in a circle in front of the dog.
Say the command “Roll Over” while making the circle.
When they complete the roll, reward them immediately from your pocket.
5. Stand Up and Refine: Gradually stop bending down. Stand up straight and make the circular motion with your hand at waist level. With practice, a simple twirl of your finger will be enough to send your dog rolling.
7. Spin
- The Signal: Point your finger at your dog and move it in a small, horizontal circle.
- How to Teach It:
- Hold a treat and use it to lure your dog in a tight circle.
- As they follow the treat, perform the “Spin” signal with your other hand.
- Once they complete the circle, say “Yes!” and reward.
8. Stand (or “Up”)
- The Signal: Start with your hand open, palm facing up, and make a “scooping” motion from your hip forward, as if lifting the dog.
- How to Teach It:
- Start with your dog in a “Sit” or “Lay Down.”
- Hold a treat and lure their nose forward and slightly up, so they have to stand to get it.
- As they stand, use the “Stand” signal, say “Yes!” and reward.

Get Your Dogs Professionally Trained at the Dan Gentile Dog Training Center
Dan Gentile Dog Training Center’s professionals are experts at training new puppies and dogs of all ages. For more information on hand signals for dog training, call (732) 938-5040 and start your dog on a top-rated training program!